
Checkbox's Xakia integration allows you to automate the creation of Xakia matters from within Checkbox Apps, allowing you to create rich, dynamic intake decision trees and sophisticated automation Apps while keeping all your data in one place on Xakia.
Connect your Xakia instance to Checkbox
Find your Xakia integration details
- Log in to Xakia and click 'Admin' in the top navigation bar
- At the bottom of the left sidebar, click on the 'Developers' menu item
- Take note of the following fields:
- API Endpoint
- Client Id
- Secret 1 (You may need to generate or refresh this value)
- Secret 2 (You may need to generate or refresh this value)
- x-xa-tenant
- x-xa-location
Copy these fields into your Xakia integration configuration settings on Checkbox
- Log in to Checkbox
- Click on your name, and select the 'Account Settings' menu item
- Click on 'Integrations' in the left sidebar
- Click on the Xakia card to bring up the configuration settings
- Fill in the details noted earlier into the corresponding fields
- Click 'Save' to validate that the settings are correct
Add & configure the Xakia block in an App
Once you've set up the integration following the instructions above, a Xakia block will appear in your Studio, which you can now drag and drop onto your App canvas.
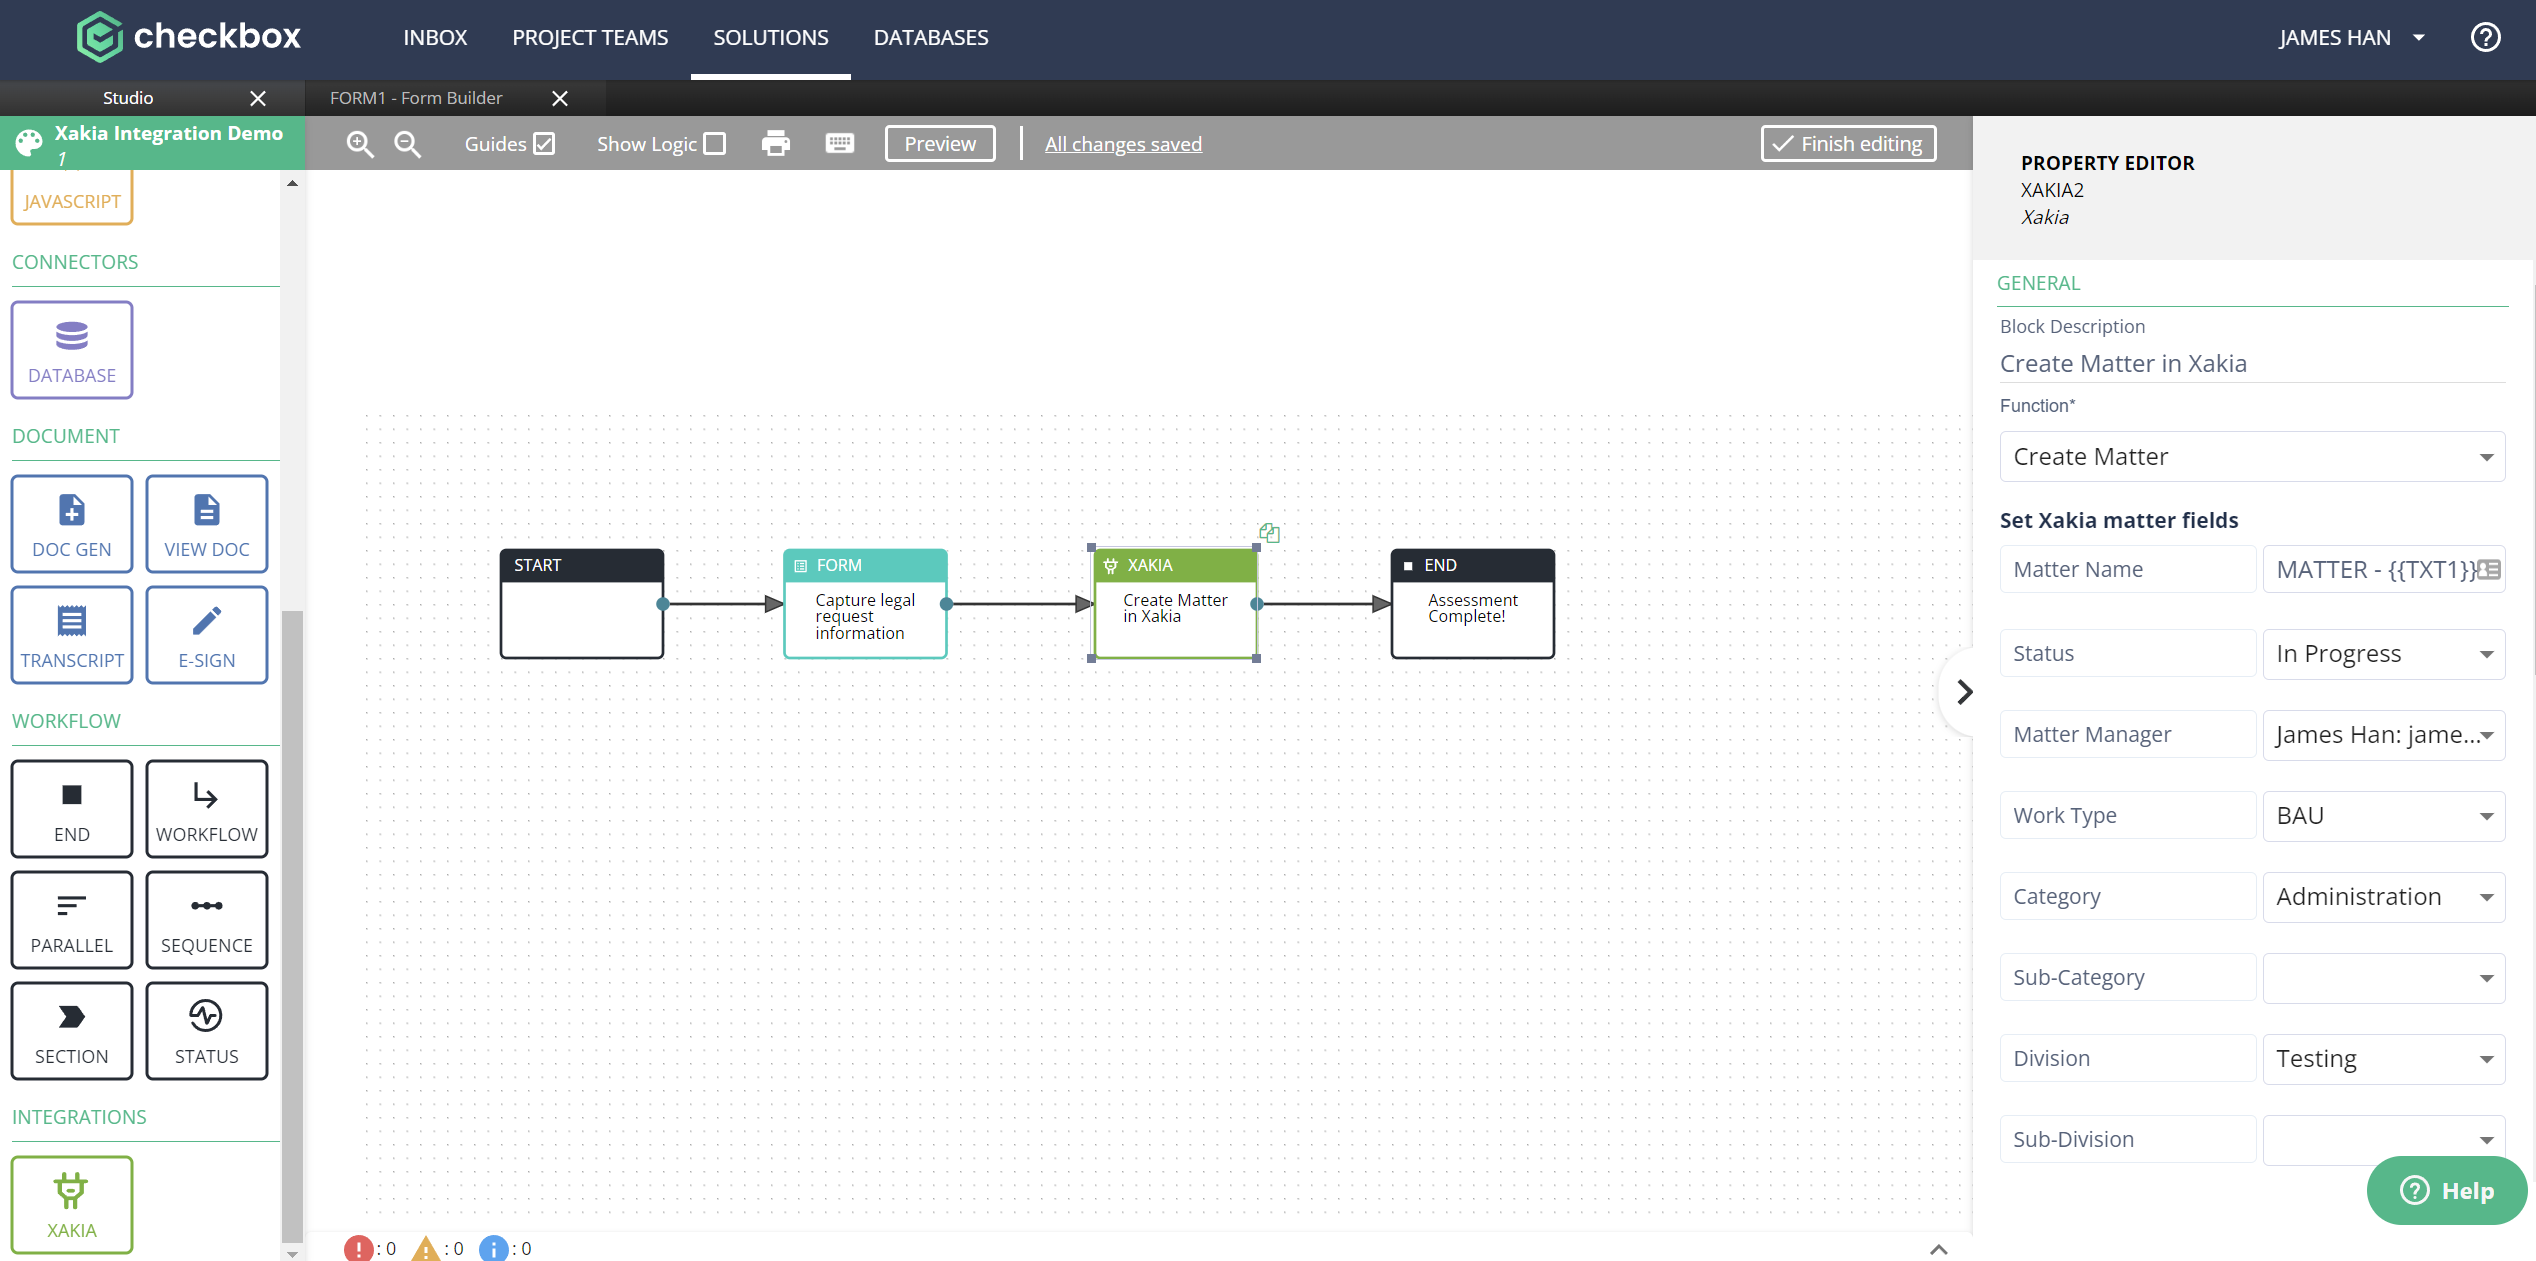
Create a matter
Once you've selected the 'Create a matter' function, you can specify what values you want to populate the Xakia matter fields with, noting that variables can be injected with {{ }} tags into the Matter Name and Description fields only.
NOTE: Custom Xakia fields are not currently supported