SKIP AHEAD TO
What is a YN block and why would you use it?
How to add a YN block
What is a YN block and why would you use it?
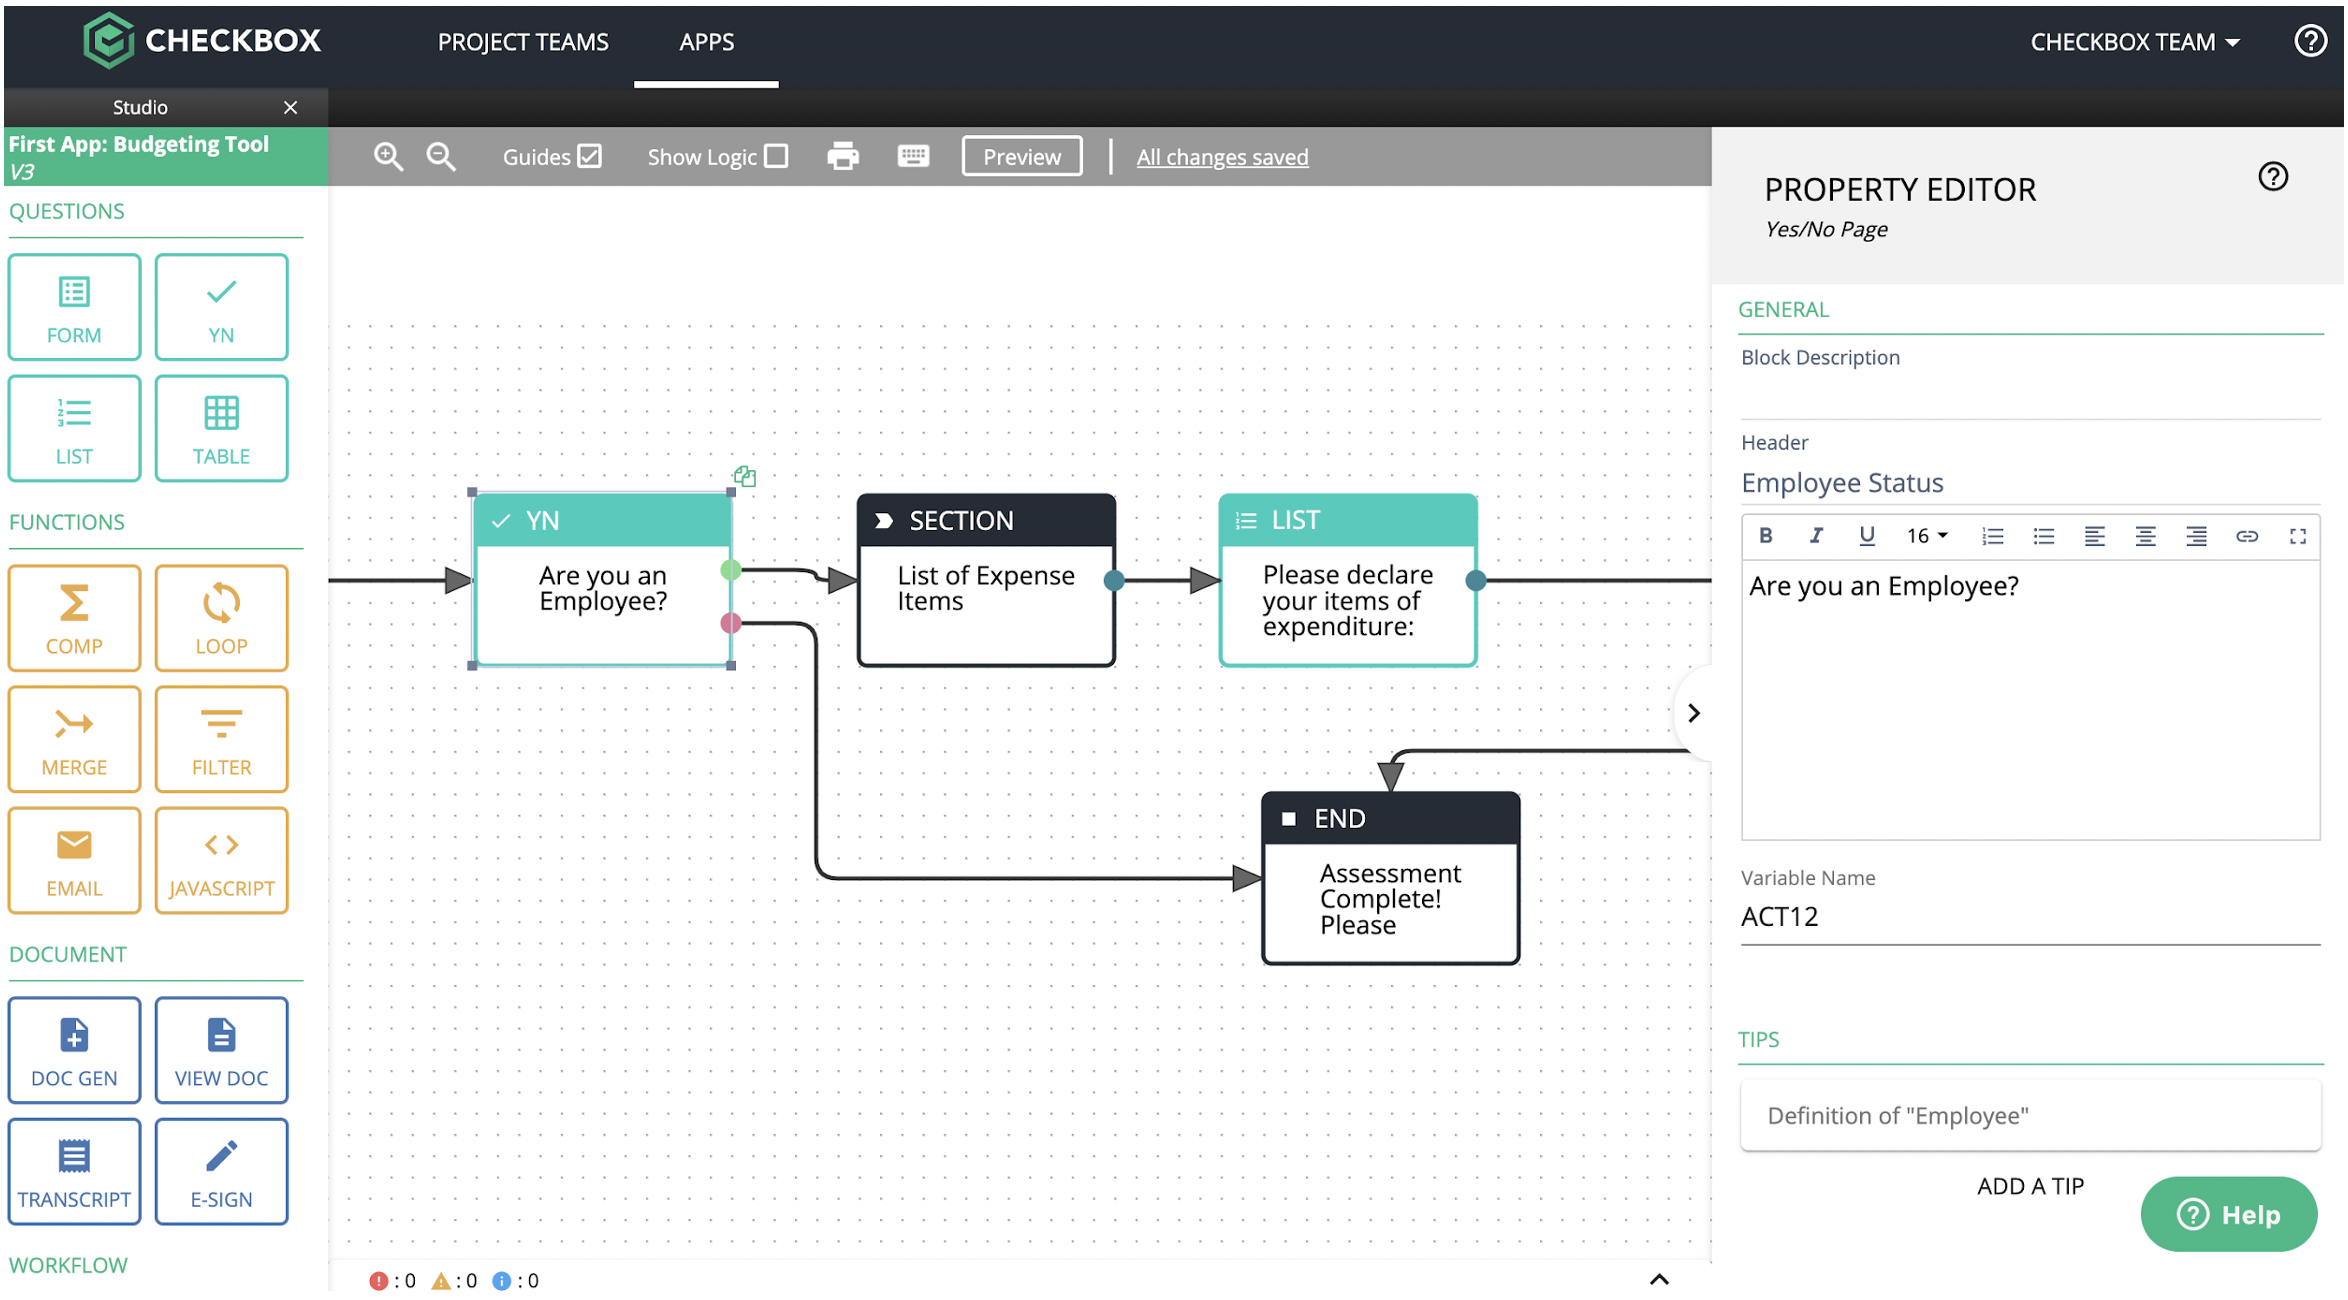
Yes/No (YN) blocks are used typically when asking the end user a simple “Yes” or “No” question. Depending on the end user’s answer, they can proceed to continue the Assessment in different paths.
YN blocks have a green node indicating “Yes” and a red node indicating “No”, where both need to be connected to another page (or pages) in your App.
For example in the below screenshot, if the end user answers “Yes” to the question, “Are you an Employee?”, they will continue completing the Assessment (as shown through the green node). However, if the end user answers “No”, they will be immediately redirected to the END block (as shown through the red node) as they are not an “Employee”, indicating that this App is irrelevant to them.
How to add a YN block
- In your App Studio, drag in a YN block from the left panel
- Connect the YN block to the previous block
- In the right panel, add a Header under the “Header” field and a question to pose to the end user in the textbox (i.e. rich text editor)
Note: It is best practice to bold the questions similar to when formatting questions in Paragraph fields of FORM blocks.
For example, in the screenshot below, the YN block is used to confirm the “Employee Status” (Header) of the end user by asking “Are you an Employee?” (question).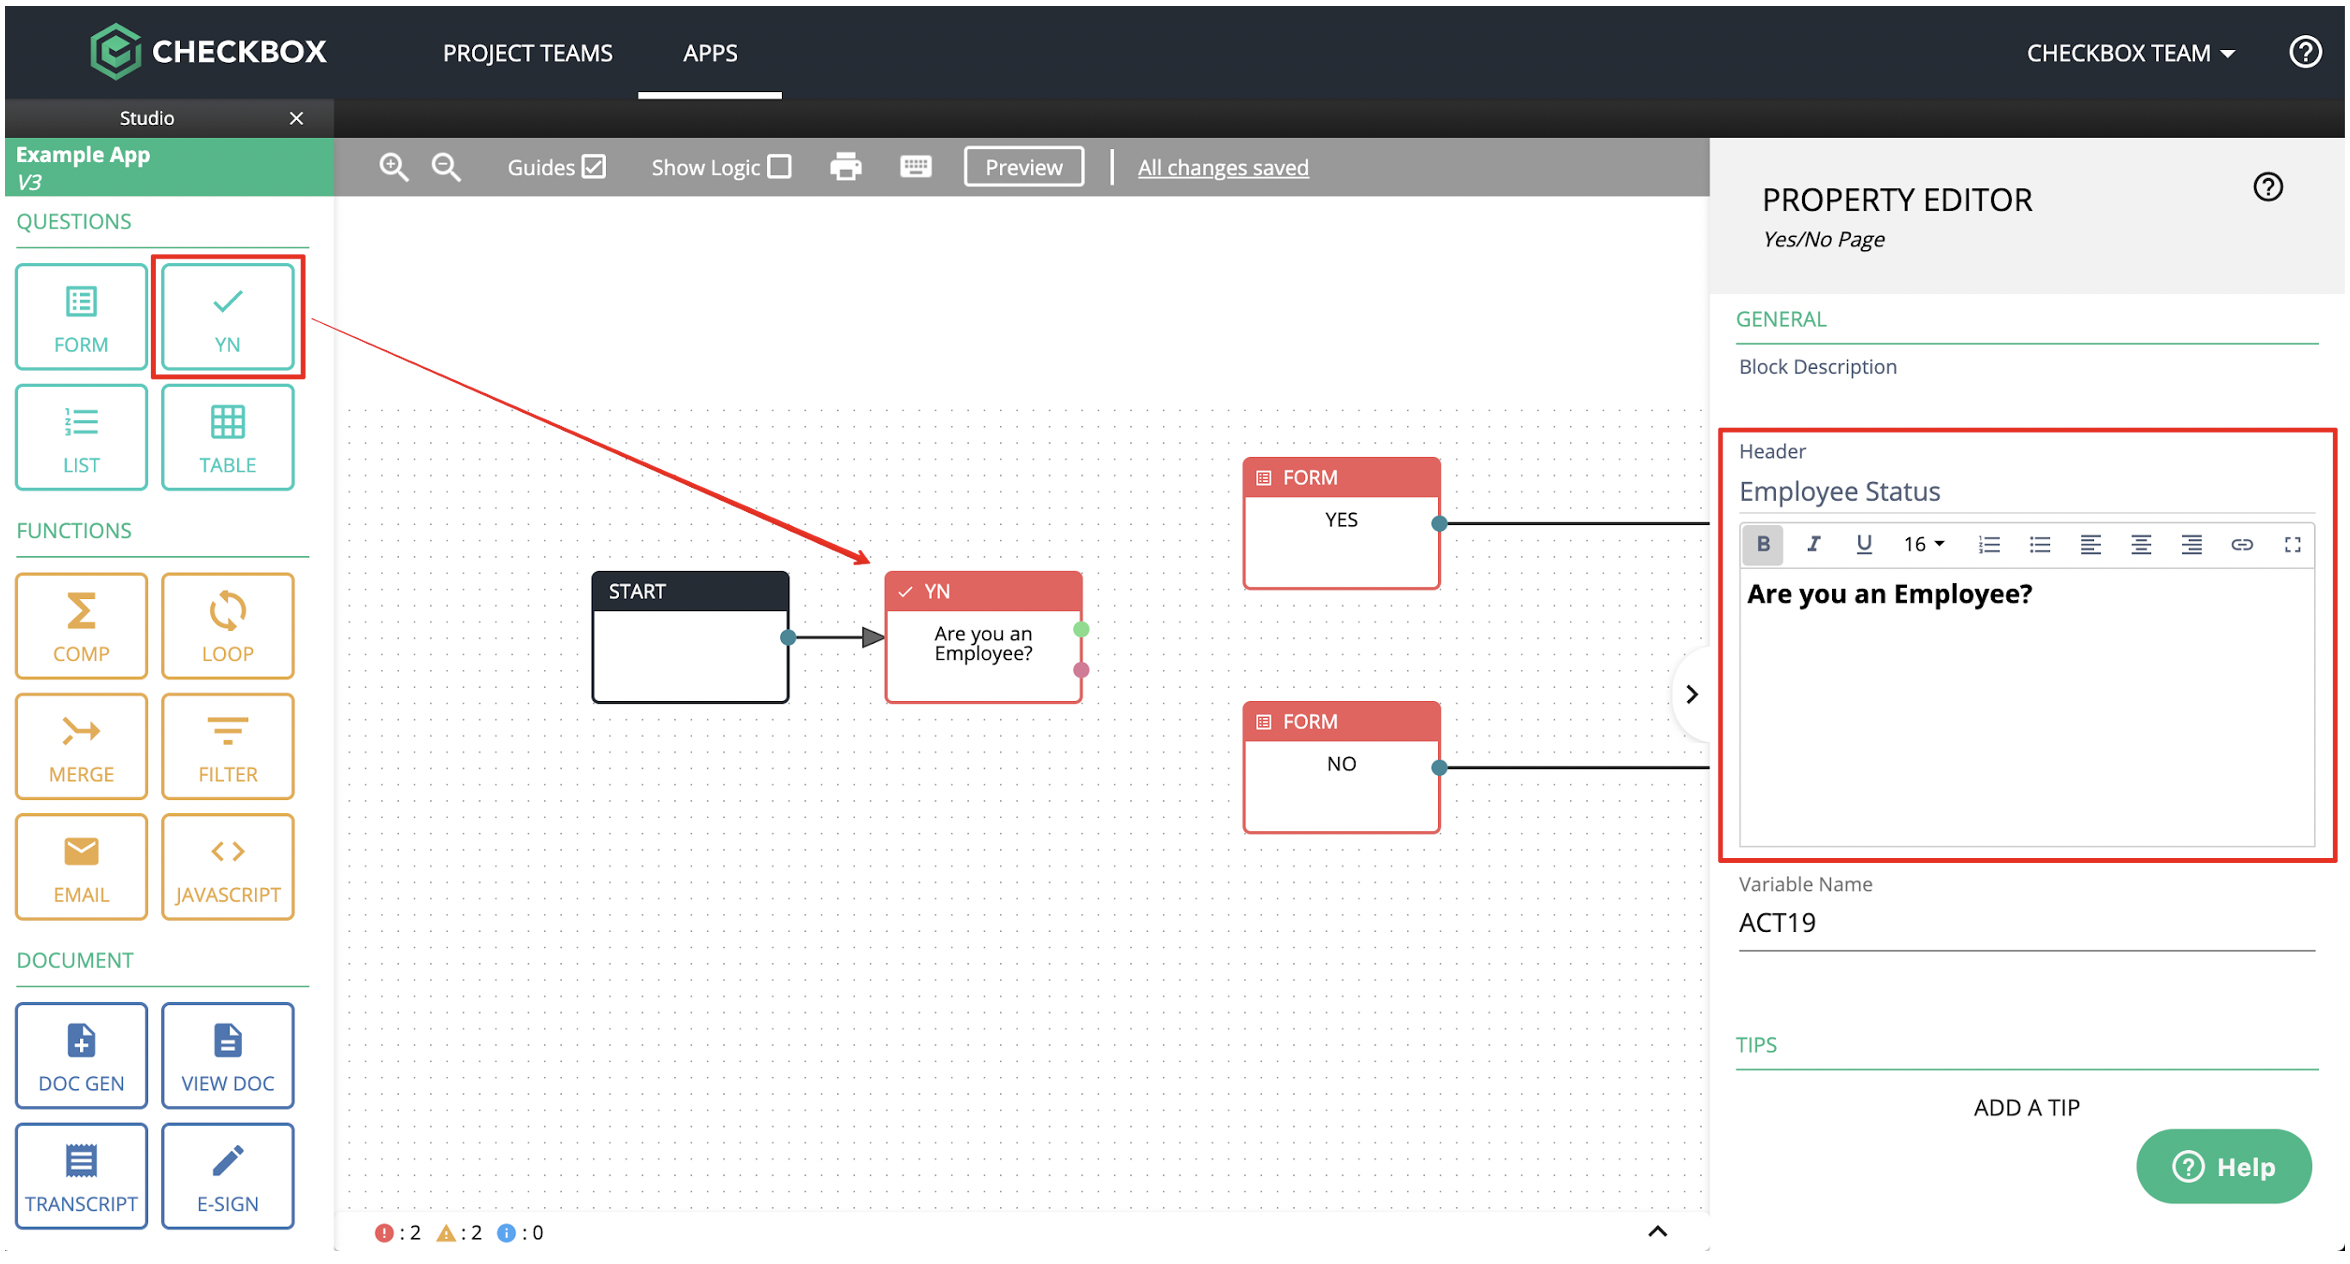
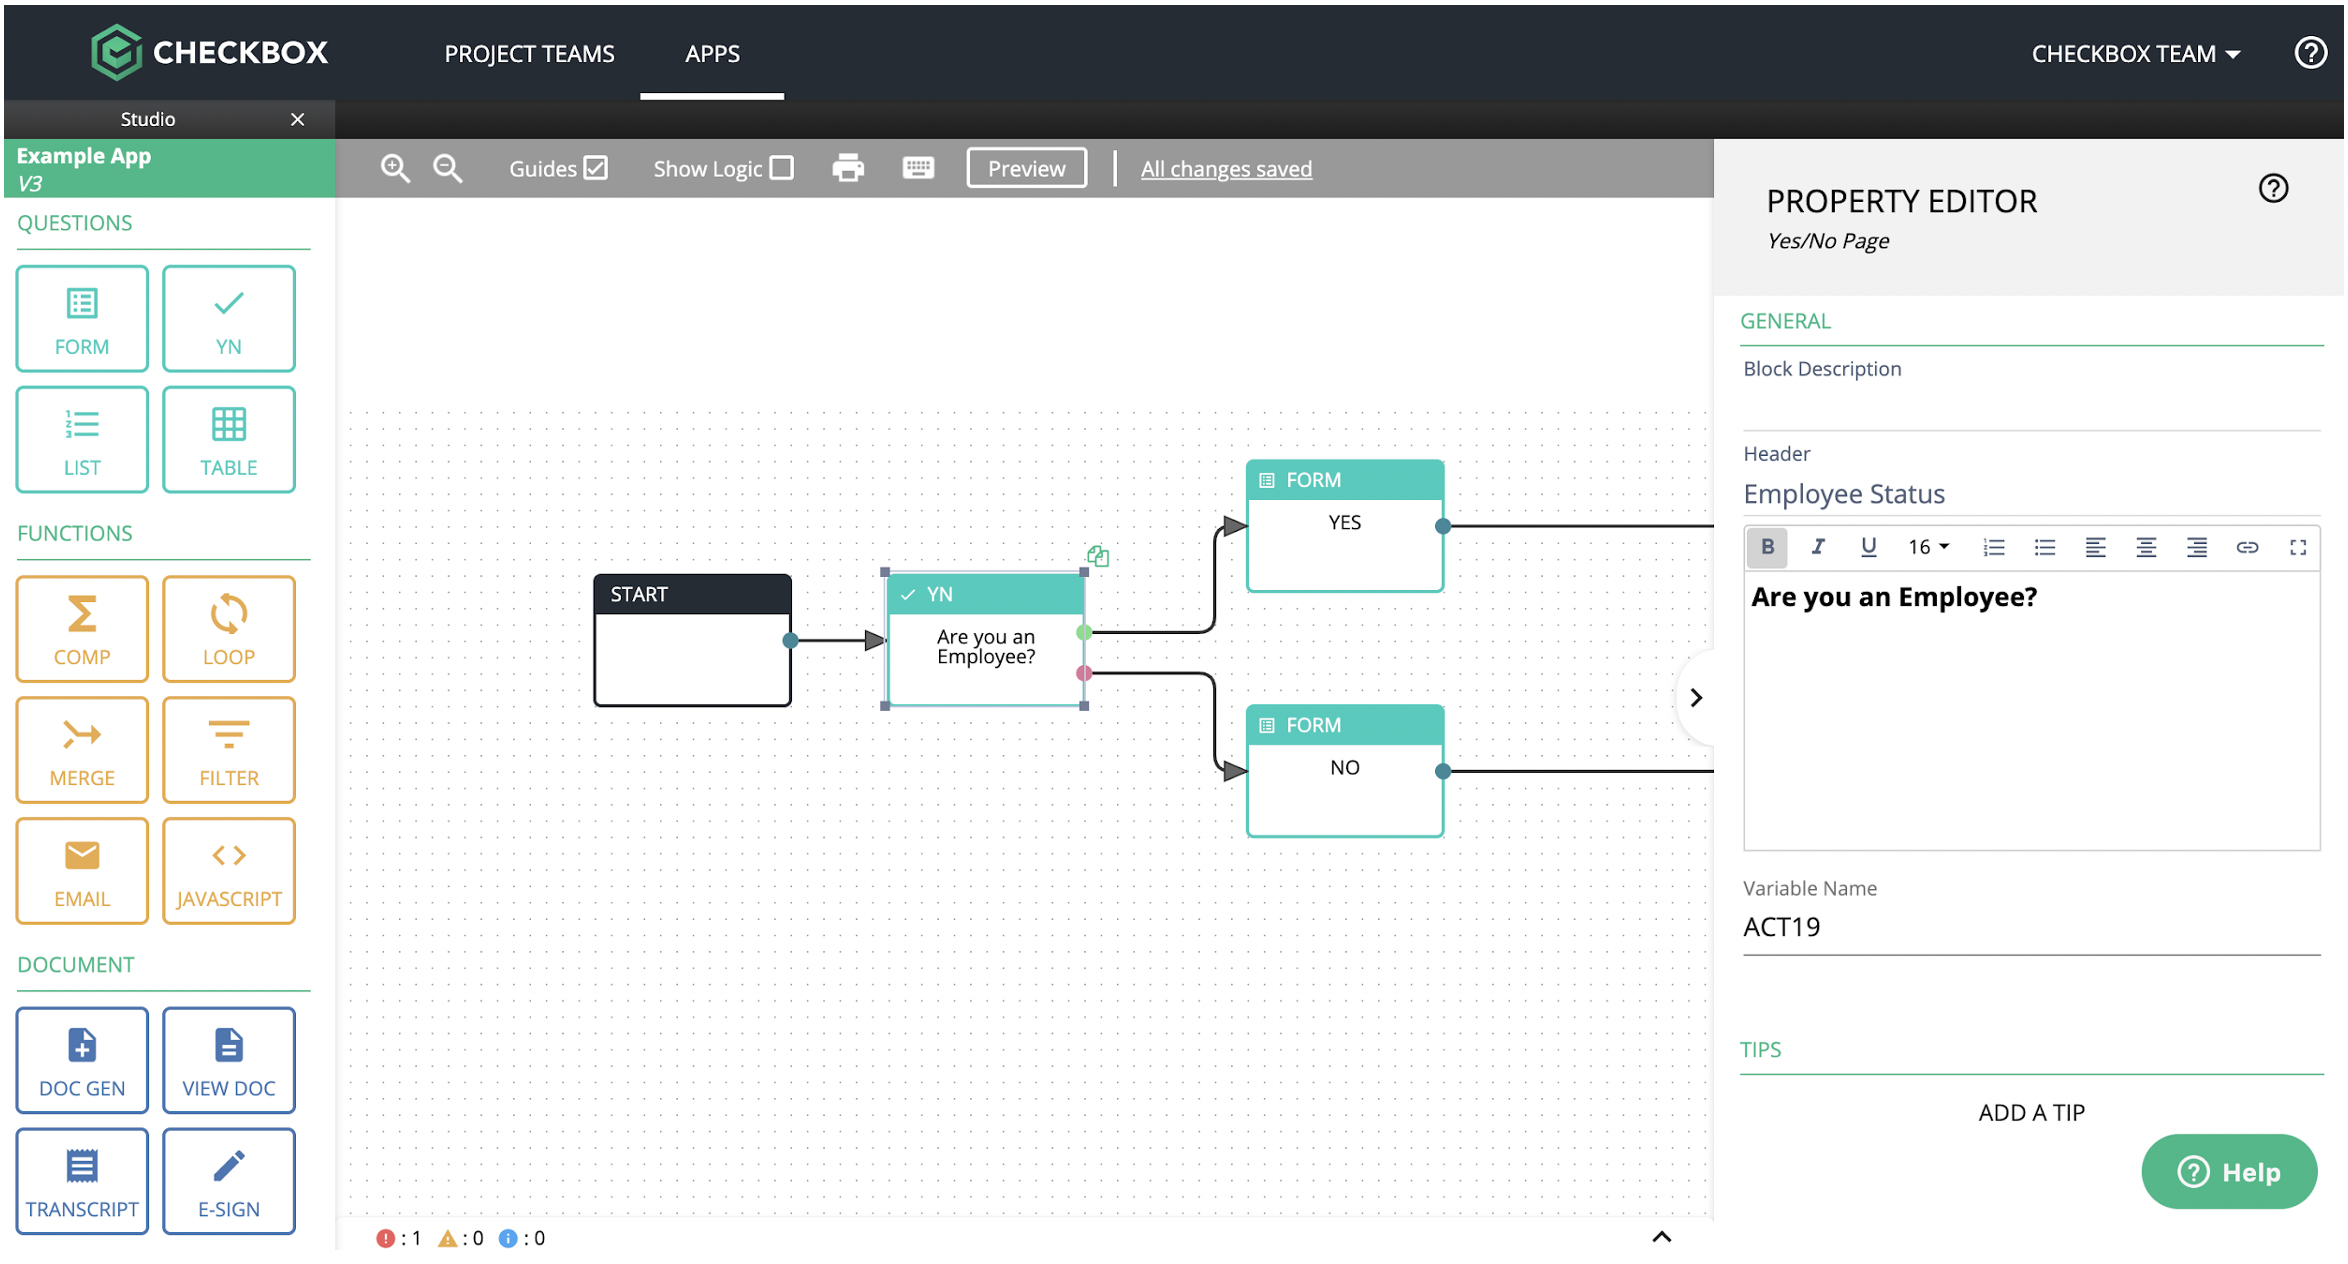
- Connect the green node of the YN block to the path you want the end user to follow if they answer “Yes”.
In this case, the green node will be connected to the FORM block with the Header “YES” - Connect the red node of the YN block to the path you want the end user to follow if they answer “No”
In this case, the red node will be connected to the FORM block with the Header “NO”
6. [Optional] You can use the "Disable BACK button" toggle to prevent users from accessing any pages before this block. Turning this toggle ON will hide the "BACK" button on this page, as well as prevent the end-user from navigating back via the transcript. Any route backs returning to pages before this block will continue to work.
Disabling the back button is useful in the following cases:
-
- You have an integration before this block, and you want to prevent users from accidentally triggering it twice
- You have email(s) before this block, and you want to prevent users from accidentally triggering it twice
- You're presenting some outcome to the end-user, and want to prevent them from returning to previous pages and changing their answers
- You've reached the end of the app, and would like to prevent the user from modifying their submission
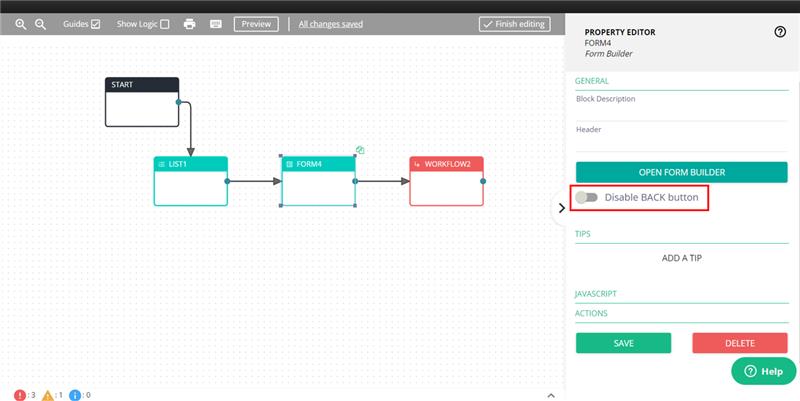 An example of the "Disable BACK button" toggle on a FORM block. This feature is also available on the List, Yes/No, Table, Transcript, Doc Review and End blocks.
OPTIONAL - You can add a tip to define terminology or provide guidance for users. Learn more about adding tips.